App: Adding installations
To add an installation to your project
- Locate where you want to add the installation on the map. You can do this by:
- Using the pan and zoom controls to the desired location on the map, and press the Add button
 in the bottom right of the screen.
 - If you are physically at the installation site, use the GPS button
 to locate yourself on the map.
- Using the pan and zoom controls to the desired location on the map, and press the Add button
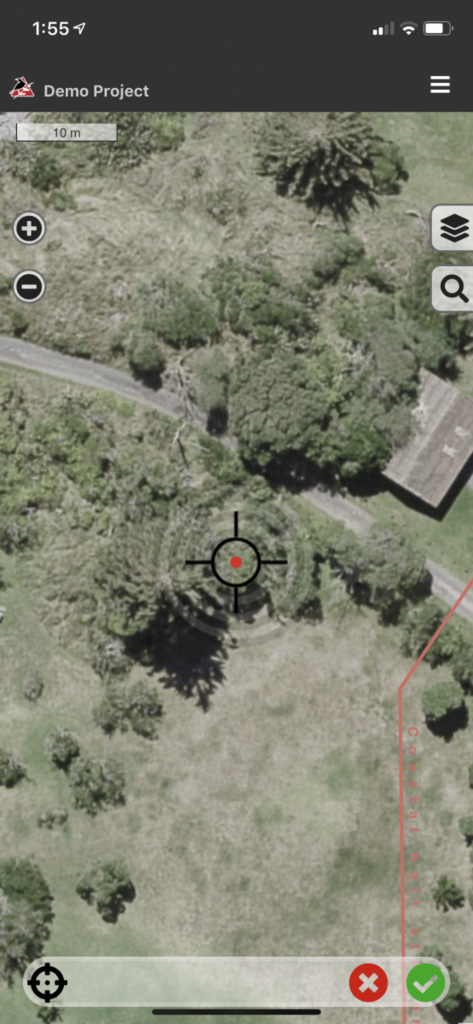
- If the location appears wrong, drag the reticule (black crosshairs with red dot in the middle) to the correct spot and press the green tick to confirm (or the red cross to cancel).
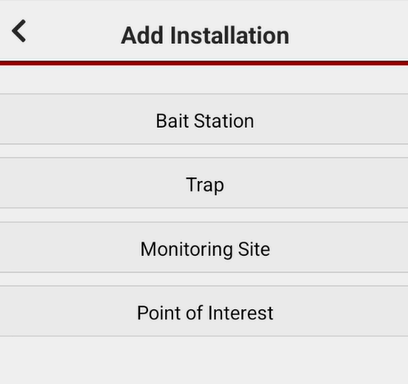
 Choose which type of installation to add: Bait Station,
Trap orTrap , Monitoring Site
To add a collocated installation
Collocated installations are installations located in the same place - for example:
- a trap and a monitoring site at the same location
- a double-set trap
- traps for different species in one spot.
To add a collocated installation, we recommend you use the app. These instructions assume you already have at least one installation at the desired location in your project. If not, follow the instructions for adding an installation above.
When you're logged in to the app and are looking at your project map:
- Log in to the app, and select your project - the project map will load
- Tap on the existing installation at the desired location - the record form for that installation will load
- Scroll down to the bottom of the form, and tap on "Add collocated installation"
- Select which type of installation you want to add
- Enter the details for this installation in the form that loads
- Press and hold the "Save" button to save this installation. It will be located at the same coordinates as the original installation.


